
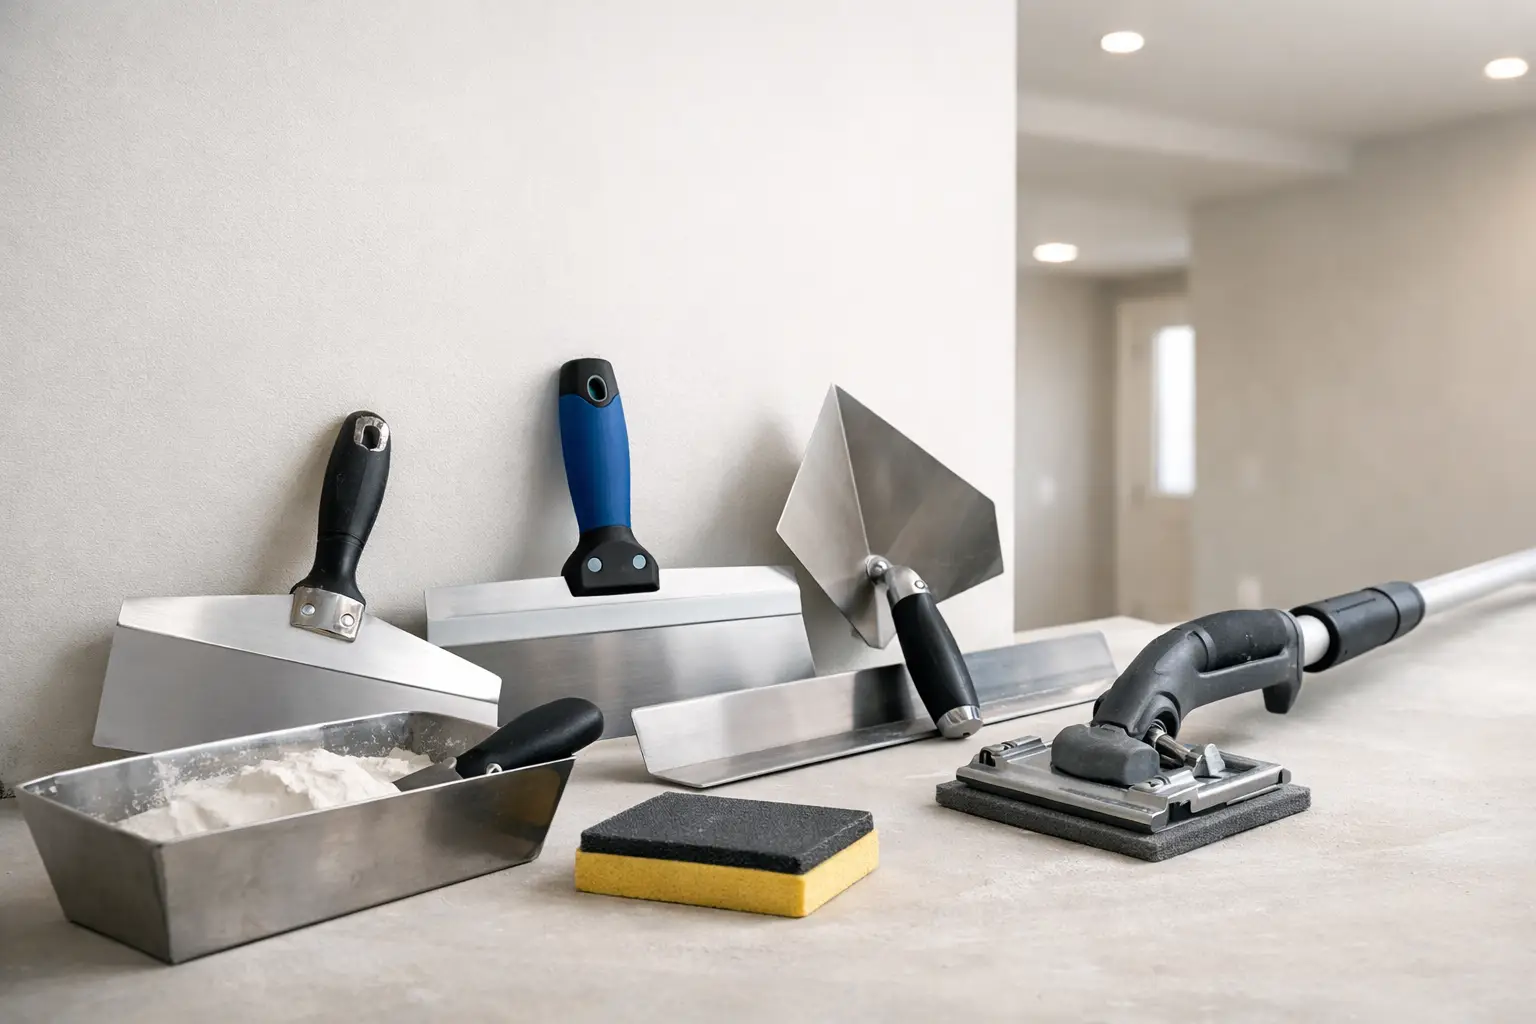
A smooth drywall finish is rarely the result of one magic tool. It comes from using the best drywall finishing tools for each stage of the work, then taking the time to apply, feather, dry, and sand joint compound properly. A good knife will not fix loose board, uneven framing, or a poorly placed seam, but the right equipment makes clean, paint-ready results much more achievable.
For homeowners planning repairs and renovators preparing a room for paint, it helps to know what each tool actually does. Some tools are worth buying for a small patch. Others make more sense in the hands of a drywall finisher who uses them every day.
Best Drywall Finishing Tools Start With Good Knives
Taping knives are the core of any drywall finishing setup. They spread joint compound over taped seams, screw heads, corners, and repair patches. A basic set usually includes smaller knives for tight work and wider knives for blending compound across the wall.
A 4- to 6-inch knife is useful for embedding tape, coating inside corners, filling fastener holes, and handling small repairs. An 8- or 10-inch knife is a practical next step for the second coat over flat seams. For the final coat, a 12-inch knife or wider finishing knife helps feather the edges so the joint disappears under primer and paint.
Stainless steel blades are a dependable choice because they resist rust and clean up well. Flexible blades are helpful when feathering the outer edges of a coat, while a slightly firmer blade can give better control when applying compound. The handle matters more than many people expect. A comfortable, solid handle reduces hand fatigue and makes it easier to hold a consistent angle.
For larger rooms, many finishers prefer broad knives or finishing trowels. These cover more area with each pass and can leave a flatter coat when used correctly. They also take practice. A wider blade can create ridges and chatter marks if too much compound is applied or the pressure is uneven.
A Mud Pan Keeps Small Jobs Moving
For patching, repairs, and short seams, a metal mud pan is simple and effective. It holds a manageable amount of compound, gives the knife a clean edge to scrape against, and is easy to carry around a room. A 12-inch pan works with most common knives, although wider pans are useful when working with larger finishing blades.
Plastic pans are lighter, but metal pans tend to clean up more easily and hold their shape. Whatever style is used, dried compound along the edge should be removed before the next coat. Small hardened pieces can drag through fresh mud and leave lines that need to be sanded out later.
On bigger drywall projects, a hawk or compound box may be more efficient. These are useful production tools, but they are not necessary for a homeowner filling a few nail pops or repairing a damaged section of wall.
Taping Tools Matter Before the Final Coat
Paper tape remains a reliable choice for many flat seams and inside corners. It forms a strong joint when embedded properly in compound. The tools needed are straightforward: a smaller taping knife, a clean pan, and enough compound behind the tape to bond it without leaving excessive buildup.
Inside corners benefit from a dedicated corner trowel, especially for less experienced finishers. It can help create a neat crease and coat both sides of the corner at once. However, a corner trowel is not always the fastest or cleanest option in every situation. Many experienced finishers use a regular knife because it gives them more control over the amount of compound on each side.
Outside corners are usually finished over installed corner bead. A 6-inch knife is useful for the first coat, followed by wider knives to feather the compound away from the bead. The goal is not to bury the corner under a thick layer of mud. It is to build a straight, durable edge and blend it gradually into the wall.
For long runs of seams, automatic taping tools can save considerable time. Tapers, flat boxes, corner rollers, and angle heads are designed for volume work, particularly in new construction and large renovations. They require maintenance, adjustment, and experience, so they are not typically the right purchase for an occasional repair.
Sanding Tools Should Control Dust and Protect the Finish
Sanding is where a decent drywall finish can either become paint-ready or turn into a dusty, scratched surface. The best approach is to apply thin, controlled coats that need only light sanding. Heavy sanding usually means the compound was applied too thickly, the wrong knife width was used, or ridges were left between passes.
A hand sanding block is useful around patches, corners, and smaller areas. A pole sander is more practical for ceilings and broad wall surfaces because it extends reach and keeps the sanding motion more even. Use gentle pressure. Pressing too hard can cut through the compound over tape or scuff the face paper on the drywall.
Sanding screens are popular because dust can pass through the abrasive surface instead of packing into it as quickly. Sandpaper can give a finer finish in some situations, but it clogs faster. Medium grit is often suitable for shaping a dried coat, while a finer grit is better for a final touch-up before primer. The right choice depends on the compound, the size of the imperfection, and how much material needs to come off.
Dust extraction sanding tools can make a major difference on larger projects or occupied homes. They reduce airborne dust and make cleanup easier, but they do not eliminate the need to protect floors, doorways, and nearby finishes. Good preparation is part of clean drywall work.
A Bright Work Light Finds What Normal Lighting Hides
One of the most valuable finishing tools does not touch the wall at all. A bright work light, positioned at a low angle along the surface, reveals ridges, shallow seams, trowel marks, and uneven repairs that overhead room lighting may hide.
This is often called raking light. It is especially useful before the final sanding and again before primer. If a seam is visible under a low-angle light, it may still show after paint, particularly with satin or semi-gloss finishes. Taking a few minutes to inspect the wall from different directions can prevent a frustrating repaint or touch-up later.
Mix Compound Properly With a Drill and Paddle
Premixed joint compound is ready to use from the pail, but it often benefits from mixing before application. A low-speed drill with a mixing paddle can make the compound smoother and more consistent. If a small amount of water is added, it should be done gradually. Compound that is too thin shrinks more, runs more easily, and may not build the coverage needed over seams or repairs.
The paddle should be kept clean, and the drill should run slowly enough to avoid whipping excessive air into the compound. For small repair jobs, hand mixing with a knife is usually enough. For a basement, addition, or full-room finishing project, a drill and paddle save time and reduce lumps.
Do Not Overlook Basic Prep Tools
A sharp utility knife is needed to trim loose drywall paper, cut tape, and clean damaged edges before patching. A drywall rasp is useful when a newly cut patch needs minor adjustment for a better fit. A straightedge helps check whether a repair patch sits flat, while a clean sponge can soften minor edges after sanding when used carefully.
These tools support the finishing process, but they do not replace proper surface preparation. Loose paper should be removed, protruding fasteners should be addressed, and dust should be cleaned away before compound is applied. Joint compound adheres best to a clean, stable surface.
Choosing Tools Based on the Job
A small wall repair does not need a production-grade tool kit. A utility knife, 4-inch and 10-inch knives, metal pan, sanding block, sanding screen, and work light can handle many common patches. Buying every specialized tool for one repair can cost more than having the work finished properly.
Larger projects call for wider knives, a pole sander, better dust control, and more careful inspection between coats. High-visibility areas such as stairwells, hallways, kitchen ceilings, and walls with side lighting deserve extra attention. The finishing level should also match the planned paint sheen. Glossier paint exposes more surface flaws than a flat finish.
For homeowners and builders in Owen Sound and across Grey Bruce, the practical goal is a finish that looks flat in the room where it will be seen, not just a wall that appears acceptable from one angle. The right tools help, but thin coats, proper drying time, and a careful final inspection are what make the difference when paint goes on.


