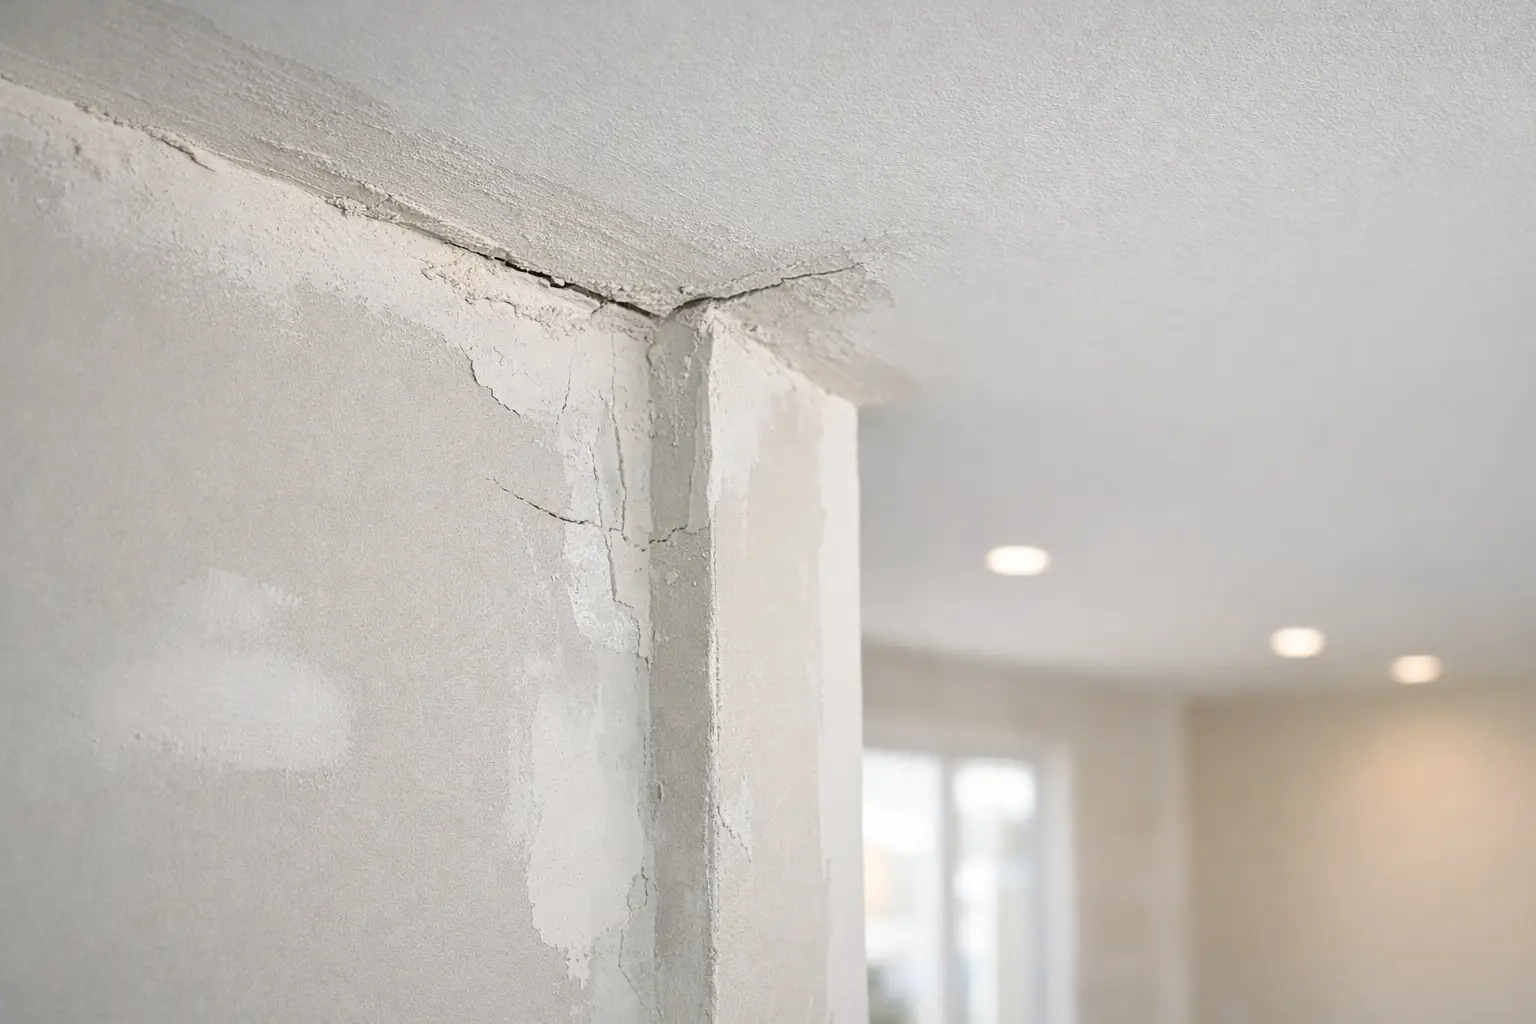
Fresh paint does not hide drywall finishing problems. In fact, a smooth coat of paint, especially in a lighter colour or a room with strong window light, often makes seams, patches, sanding marks, and uneven corners easier to see. This guide to paint ready drywall explains what painters, homeowners, and builders should look for before primer or finish paint goes on the wall.
Paint-ready is not simply drywall that looks white, dry, and generally smooth from across the room. It means the joints, fasteners, corners, repairs, and surface texture have been finished to suit the paint colour, sheen, lighting, and purpose of the space. A basement utility room and a bright living room with large south-facing windows do not need the same level of scrutiny.
What Paint-Ready Drywall Actually Means
Drywall finishing happens in stages. Sheets are installed, joints are taped, compound is applied in multiple coats, fasteners are covered, outside corners are finished, and the surface is sanded. Each step affects what will be visible once paint is applied.
A paint-ready wall should feel consistent when checked by hand and look even under close inspection. Seams should blend into the board rather than read as raised lines. Screw heads should not leave dimples, ridges, or flashing. Inside corners should be straight and properly filled, while outside corners should be clean, solid, and free of chips.
For most finished residential rooms, the expected result is commonly referred to as a Level 4 finish. This means joints and fasteners have received enough finishing compound and sanding to prepare the surface for typical flat or low-sheen paint. A Level 5 finish adds a thin skim coat over the full surface and is often worth considering where lighting is demanding or a smooth, higher-sheen paint is planned.
The right finish depends on the room. A flat ceiling paint is more forgiving than satin wall paint. Dark colours, semi-gloss finishes, and feature walls tend to show imperfections. The same is true of walls beside large windows, pot lights, stairwells, and long hallways where light runs across the surface at an angle.
Guide to Paint Ready Drywall: The Inspection Process
The best time to inspect drywall is after final sanding and before primer. The room should be reasonably clean, with dust removed from the walls and floor. Do not rely only on overhead room lighting. It can hide the very issues that become obvious after painting.
Check the walls in raking light
Raking light means shining a work light or flashlight across the wall at a low angle, rather than directly at it. This creates small shadows that reveal high spots, low spots, ridges, and uneven joints. Move along each wall and inspect it from more than one direction.
Pay particular attention to butt joints. These are the joints where two cut ends of drywall meet, and they require a wide, gradual finish to disappear. If a butt joint is too narrow or built up too heavily, it can show as a broad hump after paint.
This inspection is especially useful in open-concept rooms and rooms with lots of natural light. In Grey Bruce homes, low winter sun can be surprisingly revealing on walls facing larger windows. A surface that looks acceptable on an overcast day may look very different in direct afternoon light.
Run a hand over the surface
Your eyes catch many problems, but your hand can find others. With clean, dry hands, lightly feel across seams, patches, corners, and fastener areas. You are checking for sharp edges, raised tape, rough sanding scratches, and sudden changes in the surface.
Do not expect drywall to feel like polished glass. The goal is a gradual transition from the finished joint to the face paper of the board. If you can clearly feel the edge of a seam or repair, there is a good chance paint will make it visible.
Look for common finishing issues
A few small defects are easier to correct before paint than after it. Watch for these issues throughout the room:
- Raised seams or visible tape edges, often caused by insufficient compound coverage or sanding.
- Pitted areas and pinholes in dried compound, which can become more noticeable after primer.
- Hollow screw or nail marks, as well as proud fasteners that sit above the wall surface.
- Sanding swirls, gouges, scuffs, and paper fuzz left on the drywall face.
- Cracked inside corners, chipped outside corners, or gaps where trim will not fully cover the edge.
Small repairs are normal during the finishing process. The concern is not that touch-ups are needed. The concern is painting over flaws because they seem minor under poor lighting.
Primer Is Part of the Finish, Not a Shortcut
Primer prepares drywall and joint compound to receive paint more evenly. New drywall has different surface porosity than dried compound, so primer helps reduce uneven absorption. Without it, patched areas can appear duller or shinier than the surrounding wall, a result often called flashing.
Primer can also reveal finishing issues that were hard to see before. Once the wall has one uniform colour, ridges, pinholes, and imperfect patches may stand out more clearly. That does not mean the drywall work has failed. It means the primer coat has done its job of making the surface easier to assess.
If corrections are needed after priming, they should be patched, allowed to dry, sanded carefully, dusted, and spot-primed before the finish coat. Rushing through this stage can leave a wall that is technically painted but visually uneven.
A drywall contractor and painter should also be clear about who is responsible for the final inspection. On a renovation or new build, several trades may be working in the same space. Walls can be scuffed, dented, or damaged after finishing by trim installation, flooring work, cabinet delivery, or general site traffic. A final walkthrough before painting helps separate finishing corrections from later damage.
Paint Choices That Raise the Standard
Not every paint choice places the same demands on drywall. Flat paint has a softer appearance and hides minor surface variation better than higher-sheen products. Eggshell and satin are popular for many walls because they are easier to clean, but their light reflectance can expose uneven seams and patches. Semi-gloss is commonly used for trim and selected areas, and it is far less forgiving on broad drywall surfaces.
Colour matters as well. Deep blues, charcoal greys, and other dark tones can reveal unevenness, particularly under side lighting. Strong white paint can do the same in a bright room because it reflects light so clearly. If the design calls for a dark feature wall, glossy finish, or strong directional lighting, discuss a Level 5 skim coat before the painting stage begins.
Textured wall finishes can reduce the visibility of some minor imperfections, but texture is not a proper fix for poor taping or loose material. It also changes the future repair and repainting process. For most homes, a properly finished smooth wall remains the most flexible choice.
When to Ask for a Drywall Touch-Up
Ask for a touch-up before painting when a defect is visible in normal room lighting, obvious under raking light, or likely to show through the selected paint. A raised seam, exposed tape, loose corner bead, damaged drywall paper, or pronounced patch should be addressed before the painter starts.
It is reasonable to be practical here. Drywall is a hand-finished surface, and the appropriate standard depends on the room and finish selected. A mechanical room, garage, or storage area may not warrant the same detailed finish as a front entry, kitchen, or main living area. Setting those expectations early avoids frustration later.
For homeowners planning a renovation, it helps to choose paint colours and sheen before final drywall inspection whenever possible. That gives the drywall finisher a clearer target. For builders and painters, a shared inspection under suitable lighting can prevent avoidable return visits.
Meg's Drywall works with homeowners, renovators, painters, and builders throughout Owen Sound and Grey Bruce on drywall installation, repairs, taping, mudding, sanding, and paint-ready finishing. The useful question is not just whether the wall has been sanded. It is whether the finish suits the room that will be lived in.
Before the first coat of paint, take a slow walk around the room with the lights on and a low-angle work light in hand. A few careful minutes at that point can save a great deal of time trying to explain a visible seam after the room is complete.