
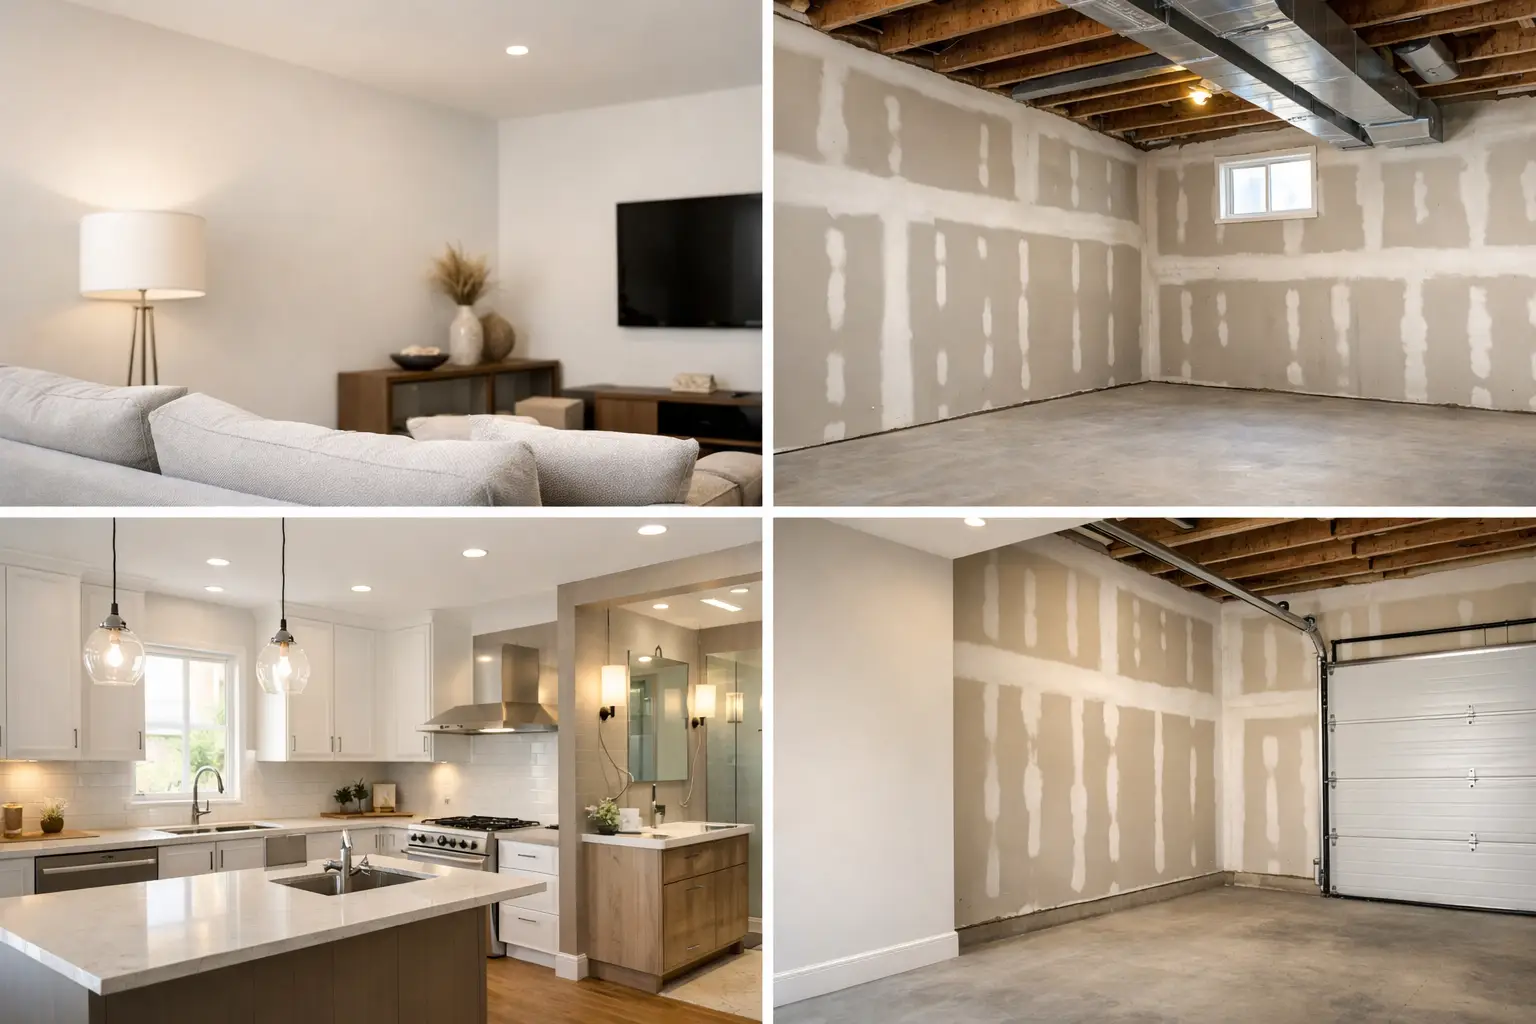
A freshly painted wall can still show every joint, fastener line, and patch if the drywall was finished to the wrong standard for the room. Knowing what drywall finish level is needed before taping and mudding begins helps homeowners, builders, and painters plan for the result they actually expect.
Drywall finish levels range from Level 0 to Level 5. They are not grades of workmanship where one is always better than another. Each level suits a different stage of construction, wall covering, lighting condition, and paint choice. A Level 2 finish may be completely appropriate behind tile in a utility space, while a Level 5 finish can be worth considering on a ceiling under strong side lighting.
What drywall finish level is needed for your project?
The answer usually comes down to four practical questions: Will the drywall be painted or covered? Will the room have smooth, glossy, or dark paint? Does natural or artificial light shine across the wall? And how closely will people see the surface every day?
For most finished rooms with standard flat or low-sheen paint, Level 4 is the normal target. It provides a smooth, paint-ready surface when the framing is sound and the work is properly taped, coated, sanded, and primed. Level 5 is reserved for more demanding conditions, while Levels 0 through 3 are commonly used where the board is unfinished, hidden, textured, tiled, or otherwise covered.
It is best to discuss finish level before drywall goes up, especially on renovations or additions. Some decisions, such as using a flat ceiling paint rather than a high-sheen product, can reduce the need for a higher finish level and help avoid disappointment later.
The five drywall finish levels explained
Level 0: Board installed, no finishing
Level 0 means drywall sheets have been installed, but joints, corners, and fasteners have not been taped or coated. This is common when the final wall system has not yet been decided or when another finish will be installed over the drywall.
It is not suitable for a painted interior room. It is simply the starting point after board installation.
Level 1: Basic taped joints
At Level 1, joint tape is embedded in compound. Fasteners and accessories may be covered enough for basic protection, but the surface is not prepared for decoration. Tool marks and visible joint areas are expected.
This level can be used in concealed spaces such as service areas above ceilings or behind other building components. It is not intended for visible walls in a finished home, office, or rental unit.
Level 2: Suitable behind tile or heavier coverings
Level 2 includes tape embedded in joint compound, a thin coat over joints and interior angles, and coverage over fasteners and accessories. The work is more complete than Level 1, but it will still show through paint.
Level 2 is often appropriate behind tile, in some garage or utility applications, or where a heavy wall covering will conceal the drywall surface. If a garage will be painted and used as a workshop or finished storage space, Level 3 or Level 4 may be a better choice depending on the owner’s expectations.
Level 3: For texture or substantial wall covering
Level 3 has an additional coat of compound over taped joints and fasteners. The surface is more even, but it is not intended for smooth paint. It is generally used where a medium or heavy texture will be applied, or where a substantial wall covering will hide minor surface variation.
A common mistake is expecting Level 3 to look like a standard painted wall after primer and paint. Under ordinary room lighting, joint lines and surface differences can become visible. If the plan is smooth painted drywall, specify Level 4 instead.
Level 4: The standard paint-ready finish
Level 4 is the most common finish for finished residential interiors in Owen Sound and Grey Bruce. It includes multiple coats of compound over joints, interior angles, fasteners, and accessories, followed by careful sanding to create a uniform paint-ready surface.
This is usually the right choice for bedrooms, living rooms, hallways, kitchens, finished basements, offices, and most standard ceilings. It performs well with flat and low-sheen paints when the wall is primed and painted properly.
Level 4 does not mean a wall will look identical from every angle under every light. Drywall is a hand-finished surface. Framing variation, window light, pot lights, paint sheen, and large uninterrupted walls can all reveal minor imperfections that would not be noticeable in normal conditions.
Level 5: For critical lighting and demanding paint finishes
Level 5 includes a Level 4 finish plus a skim coat or suitable surface treatment applied across the entire drywall face. The purpose is to create a more uniform surface for paint, particularly where lighting makes joints and slight texture differences easier to see.
Level 5 is worth discussing for areas with strong raking light. That includes walls facing large windows, long hallway walls lit from one side, high-end smooth ceilings, and rooms planned with dark colours or glossy paint. It can also make sense where a designer has specified a very smooth finish and the visual standard is particularly high.
It costs more time and material than Level 4, so it should be selected where it solves a real problem. Applying Level 5 throughout every room is not always necessary. A targeted approach can be more practical, such as using it on a feature wall, a sunlit stairwell, or a ceiling with extensive recessed lighting.
Lighting and paint are often the deciding factors
The same drywall finish can look different from one room to the next. A wall that appears excellent in a bedroom with soft overhead lighting may show shadows in a living room with a large west-facing window. This is called critical or raking light, where light travels across the wall rather than directly toward it.
Ceilings deserve extra attention because ceiling lights tend to reveal broad surface changes. Long ceiling runs, open-concept spaces, and rooms with pot lights close to walls can all benefit from careful planning. In some cases, changing the lighting layout or choosing a flatter paint sheen may be more sensible than moving immediately to Level 5.
Paint sheen matters too. Flat paint is generally the most forgiving. Eggshell, satin, semi-gloss, and glossy finishes reflect more light and make surface irregularities easier to see. Dark colours can have a similar effect, particularly on large walls. If a project calls for a dark navy feature wall or a high-sheen finish, it is wise to discuss the expected appearance before work starts.
Choosing a finish for common spaces
Most homes do not need one finish level everywhere. A practical new build or renovation may use Level 4 in the main living areas, bedrooms, finished basement, and standard ceilings. A Level 5 finish may be chosen for select ceilings, bright rooms, or feature walls with demanding paint.
In an unfinished basement, a basic finish may be enough until the space is developed. Once it becomes a rec room, bedroom, or home office, Level 4 is normally the more suitable choice. For garages, the decision depends on whether the space is simply functional or intended to look like a finished extension of the home.
Bathrooms and kitchens also depend on the wall finish. Areas that will receive tile may only need a lower drywall finish behind the tile, while painted sections generally need Level 4. The drywall substrate and finishing approach must also suit the specific location and planned wall covering.
Do not judge the finish before primer
Fresh joint compound, raw drywall paper, and sanded repairs absorb paint differently. Before primer, the wall can look blotchy or uneven even when the finishing is sound. Primer helps equalize the surface and gives a more accurate view of the final appearance.
That said, primer will not hide poor preparation, raised joints, poor corner work, or noticeable sanding marks. A proper inspection should happen with work lights and normal room lighting before painting begins. It is easier to correct a small issue at that stage than after several coats of finish paint are on the wall.
For renovations, it also helps to understand that a new drywall patch can meet a Level 4 finish while still requiring careful blending into older walls. Existing wall texture, previous paint buildup, settling, and uneven framing can affect how a repair reads after painting.
Set the finish level before the work starts
The best drywall finish is the one that matches the room, lighting, paint, and budget without paying for work that will never be seen. For most paint-ready interiors, Level 4 is the dependable baseline. Where sunlight, pot lights, dark colours, or sheen create a more demanding surface, Level 5 may be the better call.
Before a drywall project begins, look at the room at different times of day, decide on paint colours and sheen early, and point out walls or ceilings that matter most visually. That conversation gives the drywall contractor a clear target and helps produce a finished surface that suits the space.


