
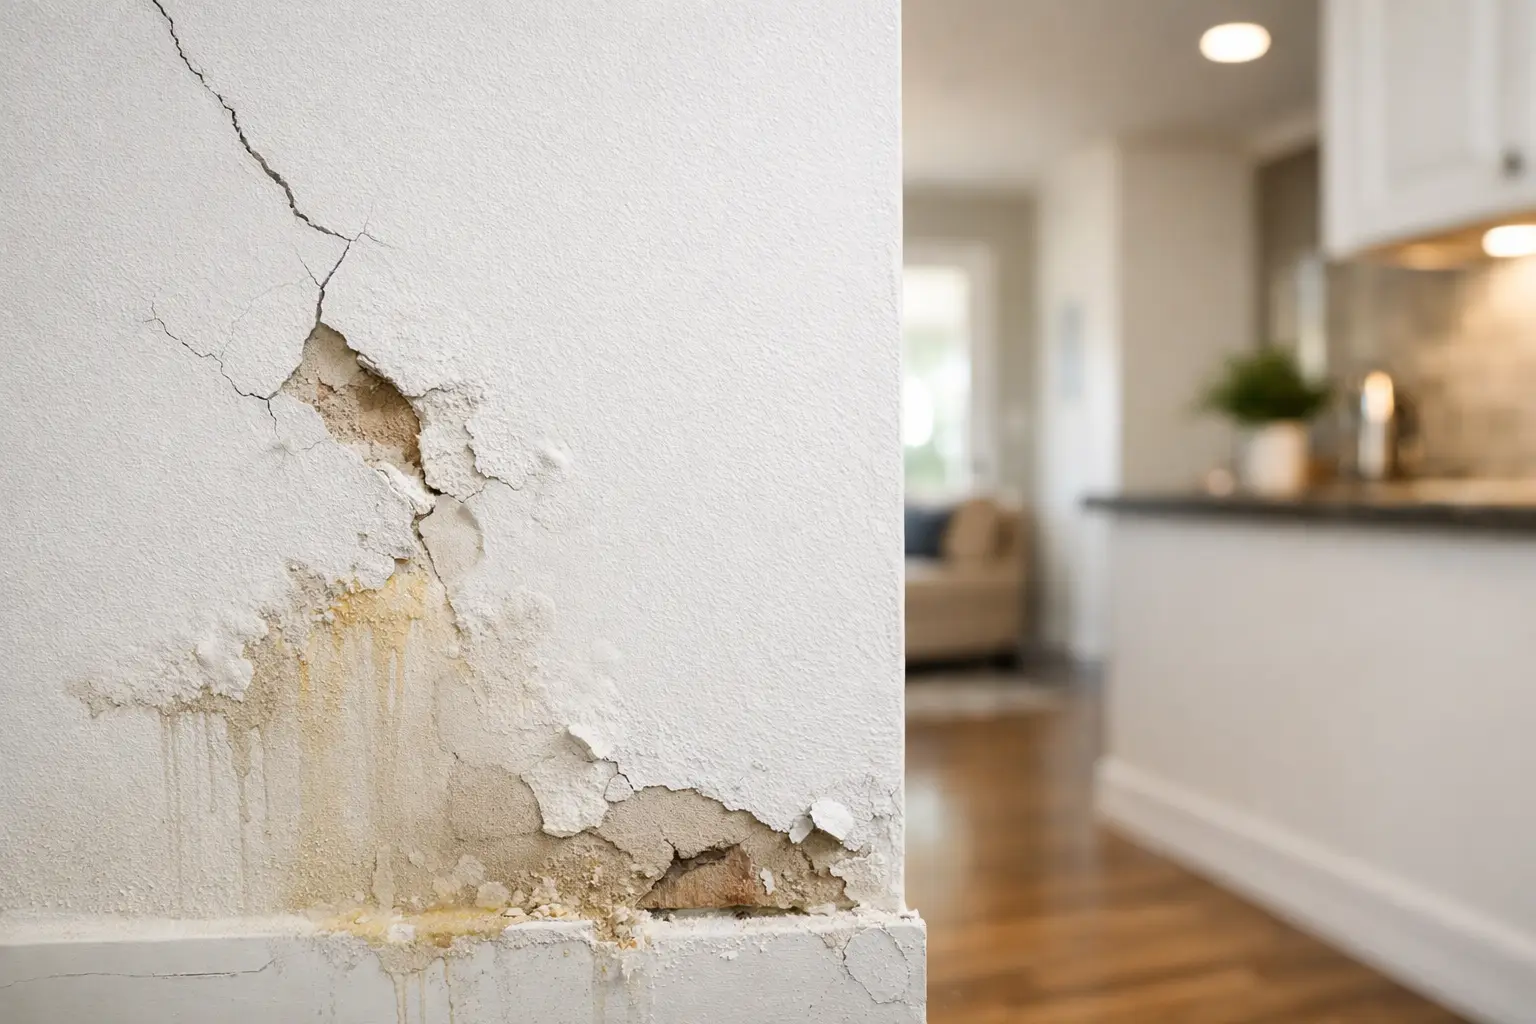
A small dent beside a doorway may be a simple patch. A soft spot under a window, a sagging ceiling seam, or cracks that keep returning can point to a bigger issue behind the finish. Knowing how to assess drywall damage helps you decide whether the wall needs a straightforward repair, closer investigation, or a professional drywall contractor.
For homeowners, landlords, renovators, and property managers, the goal is not to diagnose every cause from the surface. It is to notice the signs that affect the scope of drywall work, protect the surrounding finish, and avoid covering over damage that has not stopped progressing.
Start by Identifying the Type of Damage
Drywall is a finished interior surface, so even small problems are easy to see once paint catches the light. The appearance and location of the damage usually provide the first useful clues.
A clean hole, ding, or gouge is often impact damage. Door handles, moving furniture, children at play, and everyday wear can all leave marks. If the surrounding board feels firm and the damage is contained, the repair may only require a patch, joint compound, sanding, and paint preparation.
Cracks need a closer look. Fine straight cracks may appear where drywall joints meet, especially around door openings, window corners, bulkheads, or changes in ceiling height. A crack that follows a taped joint may be related to movement at the joint or a failed tape bond. A wider crack, one that branches, or one that reappears after repair deserves more attention before finishing begins.
Water staining, bubbling paint, softened drywall, or sagging are different from ordinary surface damage. Drywall loses strength when it has been exposed to moisture. Even after the area looks dry, the board may remain stained, swollen, brittle, or loose at its fasteners. In those cases, patching over the surface is rarely the right first step.
How to Assess Drywall Damage by Location
Where damage appears can be just as telling as what it looks like. A small hole in the middle of a hallway wall is usually isolated. Damage at a ceiling, exterior wall, basement wall, window opening, or along a floor line may need more careful assessment.
Walls Near Doors and High-Traffic Areas
Check for repeated impact. Look beyond the visible dent to see whether the drywall paper is torn, the gypsum core is crushed, or the corner bead has bent. Damaged outside corners often look minor from a distance but can require reshaping and reinforcing to achieve a clean, paint-ready finish.
For a hole, check whether the damaged area is larger than the opening itself. A fist-sized hole can leave fractured drywall around its edges. Loose or crumbling material should not be treated as a solid base for a skim of compound.
Cracks at Joints, Corners, and Ceilings
Use side lighting from a lamp or window to inspect the surface. This makes lifted tape, ridges, nail pops, and uneven repairs much easier to see. A hairline crack can be cosmetic, but tape that has separated or a joint that moves when lightly pressed suggests the repair will need more than a quick fill.
Ceiling damage deserves extra caution because gravity works against every weak joint and patch. Watch for sagging board, a visible dip, fasteners pulling through, or a long crack that runs across a seam. A ceiling may need sections removed and replaced rather than simply refinished, depending on how firm the board and fastening remain.
Damage Near Windows, Floors, and Basements
Staining or soft drywall near these areas should be checked for whether the material is dry and stable before repair is planned. Press very gently around the affected area. If the board feels soft, flakes apart, or gives under light pressure, it is no longer a sound surface for finishing.
In a finished basement, look for damage at the bottom edge of the wall, along corners, and around boxed-in areas. A repair may be limited to one section, but the surrounding board should be inspected before deciding where to cut back and replace material.
Check Whether the Damage Is Active or Old
A repair should address the condition of the drywall today, not just make yesterday's mark disappear. Ask a few practical questions: Is the crack getting longer? Is the stain darker than before? Is the paint continuing to bubble? Does the damaged area feel different from the drywall around it?
Take clear photos and note the date if you are unsure whether a crack or stain is changing. This is particularly useful in rental properties, recent renovations, and areas that are not checked every day. A single photo may not answer the question, but comparison over time often will.
Look for small warning signs around the main damage. These include new fastener pops, a slight ridge along a joint, discoloured paint, or separation where trim meets the wall. None of these automatically means extensive drywall replacement is needed. Together, though, they can show that a patch limited to one visible spot may not hold up well.
Decide Whether a Patch, Repair, or Replacement Is Needed
The right drywall repair is based on the condition of the board around the damage, not just the size of the visible mark.
Small dents, shallow gouges, and firm nail holes are usually repairable with proper filling, sanding, priming, and paint preparation. Small holes may need a backing patch and reinforcing tape so the finished surface stays flat. Larger holes generally need a new piece of drywall fitted into a clean opening, then taped and finished to blend with the surrounding wall.
If tape is loose, the board beneath it is sound, and the issue is limited to a joint, a drywall finisher may be able to remove failed material and rebuild the joint. The trade-off is that joint repairs need enough width for new tape and compound to feather out properly. A narrow repair often remains visible after painting, especially on walls with strong natural light.
Replacement is often the better option when drywall is soft, badly stained, sagging, crumbled at the edges, or damaged across a broad area. Removing compromised board gives the installer a clean edge to work from and allows the new section to be properly fastened, taped, mudded, sanded, and prepared for paint.
Look Beyond the Damaged Spot
Before booking drywall repair, inspect the adjacent wall and ceiling surfaces. This helps establish whether the work is a small patch or part of a wider finishing issue. Check nearby corners, joints, trim lines, and the opposite side of the room where relevant.
It is also worth considering the finish level you need after the repair. A garage wall, utility room, rental turnover, and main living room do not always call for the same level of refinement. In a highly visible room, a repair needs careful feathering and sanding so it disappears under primer and paint. Textured surfaces add another consideration because matching the existing texture can be more involved than repairing the drywall itself.
Paint sheen matters too. Flat paint is more forgiving, while eggshell, satin, and higher-sheen paints tend to reveal ridges and patch edges. This is why a repair that looks acceptable before painting can look noticeably different once the room is finished.
When to Call a Drywall Contractor
Call for an assessment when a crack returns, a ceiling sags, drywall feels soft, tape has pulled away over a long seam, or several areas are showing related damage. It is also sensible to get help when the repair is in a prominent room, above a stairwell, on a textured ceiling, or where a clean paint-ready result matters.
A drywall contractor can determine how far sound material extends, whether a section should be removed, and how to blend the new work into the existing finish. For renovations and additions, this same assessment helps coordinate patching with new drywall installation, taping, mudding, and sanding.
In Owen Sound and across Grey Bruce, Meg's Drywall helps property owners and builders assess repair work with the finished result in mind. The best next step is usually simple: do not rush to cover the damage. Confirm that the drywall is firm, stable, and ready for repair, then choose a repair scope that will still look right after the paint goes on.


